

Remove background from photos

Paint 3D is a pre-installed application on Windows 11 as well as recent versions of Windows 10 that helps users create 3D images. The application provides a great set of features that will benefit the average user and not only the designers, such as the Magic Select tool, which allows objects within any image to be selected very accurately and then separated from the background, either for the purpose of deleting them or placing them on another image. The tool is completely free and works just as efficiently as similar professional tools that perform this role. Indeed, we have tried it and prepared a dedicated topic for it under the title of extracting any object from the image without software .
Not only does it extract objects, you can also use it to remove background from images — without Photoshop and the like. Simply put, if you have an image with a specific element and you want to isolate it and add it to a new background, or even leave the background transparent, all you have to do is open the Paint 3D application, then activate the Magic select tool and select the element to be isolated. Upon completion, you copy the element and add it to a new page on the application. In the last step, you save this page in PNG format with the Transparency option enabled. In the end, you will get a new image in which only this element that you selected appears, and you can easily add it to another background.
Convert image formats

What are the most specialized programs for converting image formats, which we often need when sharing images on the Internet, as some sites refuse to receive all types of images and are limited to specific formats only. If you have encountered this situation before or for any reason want to change the format of a particular image, instead of downloading external programs, you can rely on the Paint tool. This tool has been in Windows since time immemorial! And if you got major improvements in Windows 11, but the basic functions of the tool remain present, including the ability to save images in multiple formats other than the original format, including support for opening images with WebP format that are widespread these days, then they can easily be converted to another format through “Paint.” ".
All that is required is to open the image inside the tool by right-clicking on the image and selecting "Open with", then select "Paint" from the drop-down list as shown in the attached image. After viewing the image, click on “File” from the toolbar, then point the mouse cursor towards the “Save as” option to pop up a new menu containing the most commonly used and popular formats to choose from quickly, or you can choose “Other format” and from the window that appears, click on the Save menu as type and select the required format, such as BMP, HEIC, PNG, JPG, TIFF, or ICO.
In the end, click Save to save the image in its new format, and you will notice that the quality is almost the same. It is also worth noting that this method can be applied to all old versions of Windows.
Edit videos
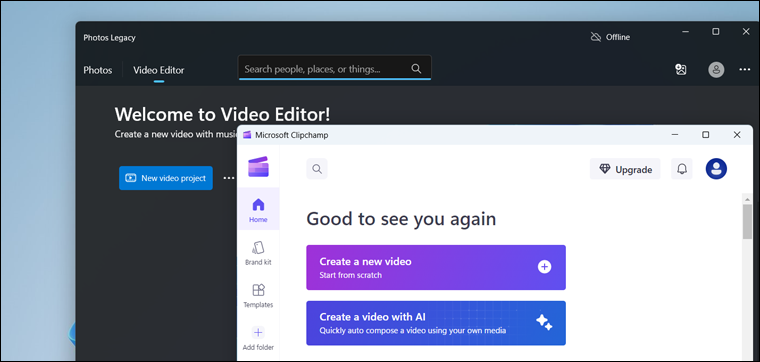
Windows has a huge number of video editing programs, but most of them are paid programs because they are professional and include a huge package of editing options such as Adobe Premiere and Vegas Pro. But if your goal is to make simple edits to a video, there is no need to buy or download third-party software because modern versions of Windows already contain dedicated tools for that. For example, in Windows 11 you will find an application called Clipchamp, which Microsoft has included in the system starting with the 22H2 Update, and Windows 10 users can download it for free from the Microsoft Store, and it is an application that replaces the old Microsoft Windows Movie Maker tool.To create or edit video clips professionally, as it includes a huge set of tools that content makers need to produce high-quality clips, whether by editing videos, recording videos, removing audio from the video, and others.
Windows 11 and Windows 10 also contain a video editing widget called Video Editor, which is part of the default Photos app . Generally, this application helps users to create a video clip from a group of photos or short videos, with many tools available such as controlling transition effects, rotating the video and cropping parts of it, to get a fairly satisfactory result without buying expensive video editing software. In fact, we have previously reviewed how to reduce video audio , how to merge more than one video together into one video, even adding filters to the video , as well as removing audio from the video and adding music to the video.… They are all based on the Video Editor tool. Therefore, the tool offers a wide range of "basic options" for editing videos, and what distinguishes it most is ease of use. Even if you are a novice user who does not know anything in montage, you will deal with the tool completely like a professional.
Display the FPS rate while playing

If you are a person interested in the world of video games or "gamer", then you know very well about FPS or the number of frames per second, and if you do not know, it is in short a measure of the quality of graphics in video games, so that whenever this rate is 60 or higher, the graphics, effects and movement in the game Better and smoother, but if the rate drops to 30 or 20, this is an indication that your device, specifically the graphics card, is not sufficiently efficient to run the game, and you have two options to continue playing the game: either reduce the graphics settings or upgrade the components. We have already explained in a previous topic the extent to which FPS affects the quality of game display , so I advise you to review it to better understand the meaning of this term.
The important thing now is how do we know the FPS rate while playing a game to evaluate performance? There are many ways to display the FPS counter in games, but for Windows 10 or Windows 11 users, they can use the Game Bar feature, which already allows displaying the FPS counter in games, in addition to displaying computer resource consumption percentages in real time. All that is required is to click on the Win key + the letter G while playing, after which you will get a set of tools, including Performance, which displays the performance of the computer in the game, as shown in the image above.
Turn your computer into a router

Modern versions of Windows include the hotspot feature, which eliminates the user from using programs to convert the computer into a wireless router so that the Internet connection (wired or wireless) can be broadcast via a new Wi-Fi network with a different name and password, and connect other devices wirelessly to the computer instead of directly to the router. This is useful in many situations, and we have previously explained how to activate the hotspot to share the Internet connection in Windows. You can view it to know the steps necessary to connect a device to the Internet through another device connected to the service and using Windows 11 or even Windows 10.
Know the temperature of the components of the device

Monitoring the temperature of the computer and its components is an essential step in preserving it from damage and avoiding burning of its hardware. That is why there are many free programs that help to know the temperature of each piece of the computer and warn you when the maximum temperature that the components can handle is exceeded. But in recent versions, there are basic methods in the system that do the same thing, that is, it clearly shows the temperature of the computer components, specifically the temperature of the graphics card and the storage unit.
For example, to find out the current temperature of the graphics processor, all you have to do is go to "Task Manager" or "Task Manager" in the Arabic interface, then go to "Performance" and in the part dedicated to displaying the graphics card consumption graph, you will find the temperature indicator , as shown in the image attached above. As for monitoring the hard temperature, you open the Settings application, then go to the System section, then Storage, then click on Manage Disks and Volumes, where the volumes connected to the computer appear. Click on the SSD NVMe storage unit, and below you will find information about the status and temperature of the storage unit.
Analyze hard space and find large files
We previously published a topic titled Knowing which folders, files, and large programs consume the most space on your hard drive, and surprisingly! In all the methods that we have covered, we did not rely on any external program, as Windows already contains tools that help you discover what is taking up a lot of space on the hard drive or SSD, and therefore it is easy for you to save a lot of space for more important files in case you find that there are large files other than necessary on the computer.Many programs such as WizTree and WinDirStat analyze the contents of the hard drive and categorize files and folders and arrange them according to size, but there is no need to use them because modern versions of Windows do the same thing. All that is required is to open the Settings application, then System, and on the Storage page, click on the View storage usage on other drives option, then select the partition and wait for its contents to be analyzed. After completion, you will get a list of different categories, each category contains a group of large files that belong to it, such as video files, music files, games, programs...etc. You can also delete any item with one click from the same page. In the end, after deleting some of these files, you will have enough free space to store more new files without the need to upgrade the hard drive.
Run programs in isolation

Many times we need to install and run some programs in isolation, meaning using them on a fake system away from the main operating system installed on the computer, thus ensuring that if the program contains viruses or malware, it will not affect the device, and this process is known as sandboxing and has uses There are many , but the methods available to do this process were either by using Sandboxie or SHADE Sandbox or Virtual Machines such as VirtualBox or VMware to install a virtual system. However, in recent versions of Windows, there is a Windows Sandbox feature to eliminate the need to use any of these programs.
Users can activate the Windows Sandbox feature in a very easy way by placing a checkmark ( ✔ ) next to it in the Windows Feature window and running it does not require much computer resources. And then when you want to create a dummy system as a test field for programs and so on, all you have to do is run the feature from the Start menu and in a few minutes a dummy system of Windows 10 or 11 will be created where you can do whatever you want freely and in isolation from the basic system.
Change the dimensions of the images

Whether you are a graphic designer, blogger, or even just a person who shares posts on social media, you will always need to resize images, and what is meant here is to change the dimensions or measurements of the image. Fortunately, many programs and tools are available that perform this function easily and to the fullest, but as usual, they are not needed in Windows, as there are 3 ways to change the dimensions of images in Windows without programs, including a method using the Photos application.
All you have to do is double-click the image to view it in the Photos app, then press the menu button (⋯) at the top and select "Resize". After that, another window will appear where you can specify the width and height in relation to or in pixels. You can also select the image format and from the Quality indicator, you can set the final image quality. Note at the bottom of this window that the image size is displayed after any adjustment has been made, so keep an eye on the size indicator to get the image to the desired size before saving. Finally, click Save to save another copy of the image (while keeping the original) on your computer.
Convert units and currencies

Whether you want to convert between the currency of your country and another country, or convert between units of measurement, speed, and length, Convert 123 has always been the most suitable option for that, as it is free, small in size, and easy to use on any computer. But of course, a simple task like this will not require the installation of external programs to be completed. In Windows 10, the calculator application can be relied upon to do the job perfectly. The app is definitely not intended for direct calculations, if you press the (☰) button you will get a menu with a unit converter to quickly convert currency rates, distance, temperature, area and more.
Control any computer remotely

Whether you have another computer that you want to control with your current machine instead of switching back and forth between the two devices, you need to help friends or family members fix a problem on their computer, or provide technical support to remote users, all of these scenarios may find Programs such as TeamViewer and AnyDesk are ideal for quickly accessing and controlling your computer from one computer to another without having to be physically in front of the second computer. You may not know it, but modern versions of Windows already contain a program that performs the same role! It is called Quick Assist and we explained how to use it in a previous thread.
Similar to similar programs such as TeamViewer, Quick Assist works by generating a unique code that must be shared with the person who wants to remotely control the computer. Once the code is shared, the person providing technical support can see the computer screen and control the mouse and keyboard to help troubleshoot problems. The only drawback of the application is that it does not allow sharing files between devices, other than that it is a useful application and it is important to know how to use it, perhaps you will need it one day.
Convert any video format

The Photos application in Windows has the ability to play and save video clips in a format different from the original one, but the problem is that the number of formats allowed to convert to or from them is somewhat small compared to external programs, but it is worth a try. All you have to do is right-click on the video, select "Open with," and select the Photos app from the drop-down menu to play the video content within the app.
As is the case with converting images through the application, after playing the video, press the menu button ( ⋯ ) at the top and choose "Save as", then the usual Browse window will appear where you specify the location to save the video in the new format on your device, and after selecting the location click on the Save as menu type and select the format you want to convert the video to. If the video is in AVI format, you can choose WMV, MP4, or any of the video formats listed. Then press Save.
It takes about a minute or less for the Photos app to finish converting the video format, but once it's finished you'll get a new (separate) copy of the original video in the format you selected earlier, and you can easily play the video on other devices that support this format.